Express installation of Azure AD Connect
Tool Can be downloaded from Here
- Sign in as a local administrator to the server you wish to install Azure AD Connect on. You should do this on the server you wish to be the sync server.
- Navigate to and double-click AzureADConnect.msi.
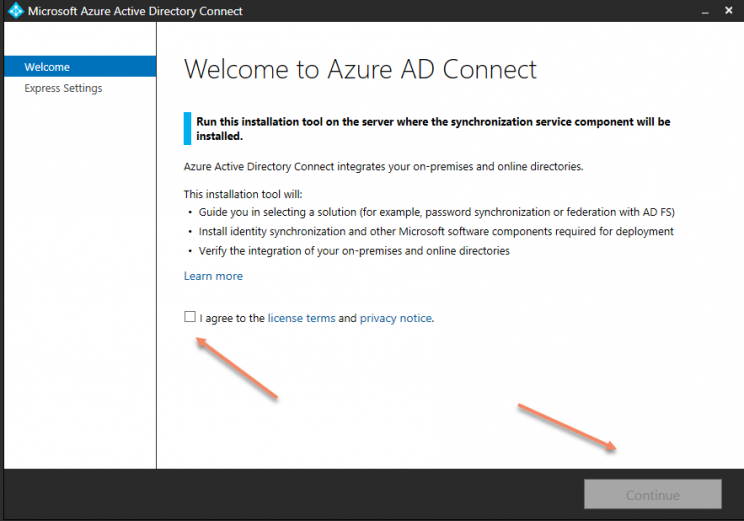
- On the Welcome screen, select the box agreeing to the licensing terms and click Continue.
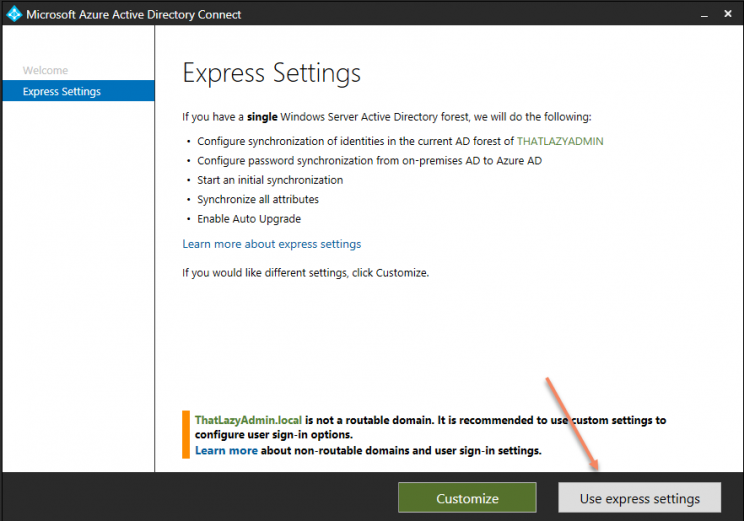
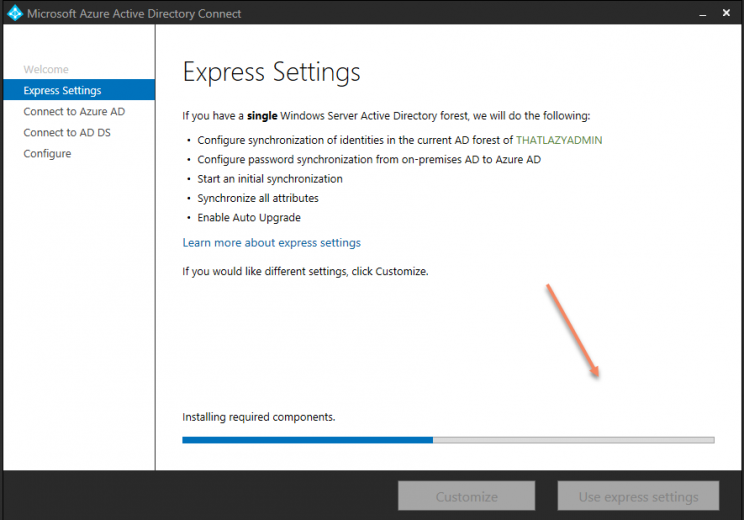
- On the Express settings screen, click Use express settings.
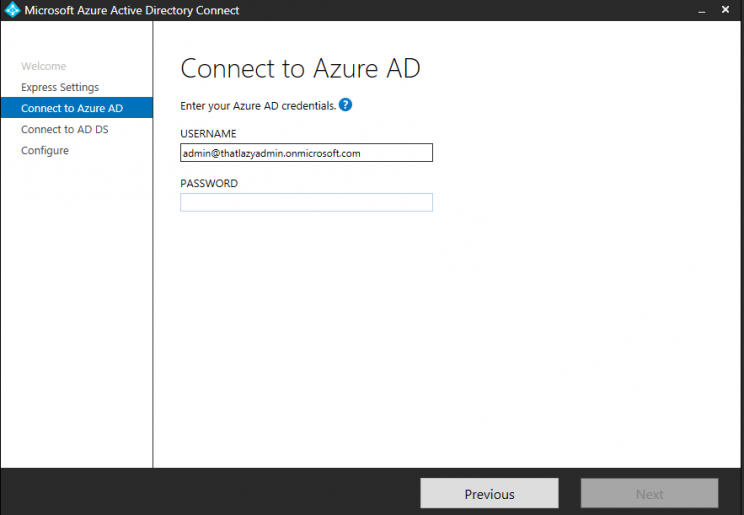
On the Connect to Azure AD screen, enter the username and password of a global administrator for your Azure AD. Click Next.
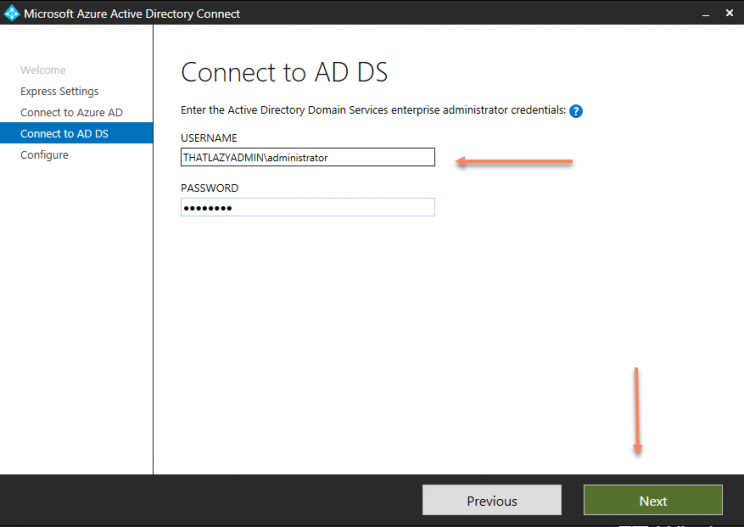
On the Connect to AD DS screen, enter the username and password for an enterprise admin account.
You can enter the domain part in either NetBios or FQDN format, that is, ThatLazyAdmin\administrator or ThatLazyAdmin.local\administrator. Click Next.
The Azure AD sign-in configuration page only shows if you did not complete verify your domains in the prerequisites.
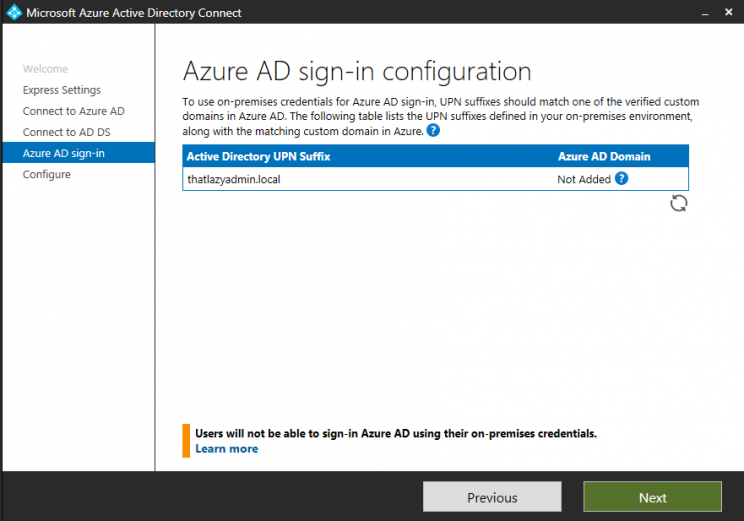
If you see this page, then review every domain marked Not Added and Not Verified. Make sure those domains you use have been verified in Azure AD.
Click the Refresh symbol when you have verified your domains.
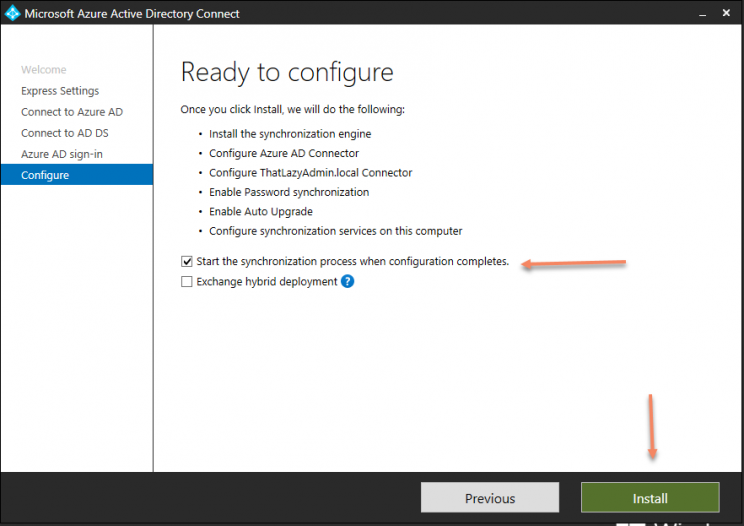
For this demo we will not select “Exchange hybrid deployment”.
When the installation completes, click Exit.
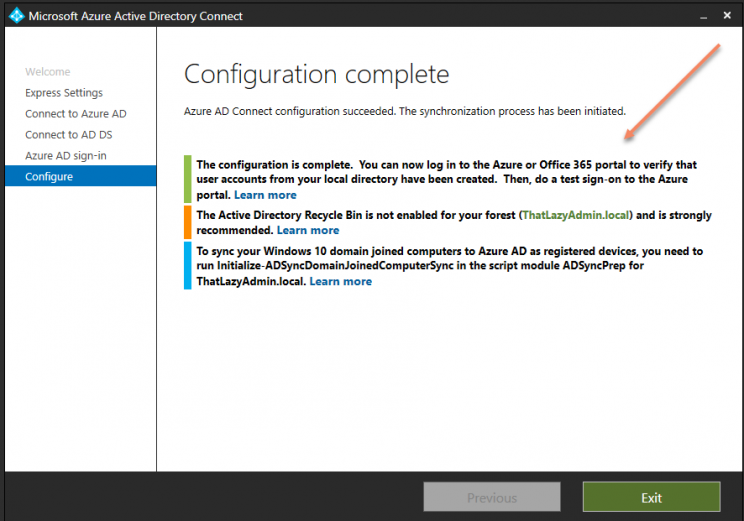
After the installation has completed ,the tool provides some recommendation which can you implement as shown above.
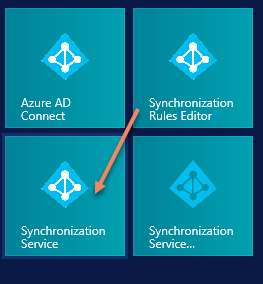
sign of and then back on and then launch the synchronization manager
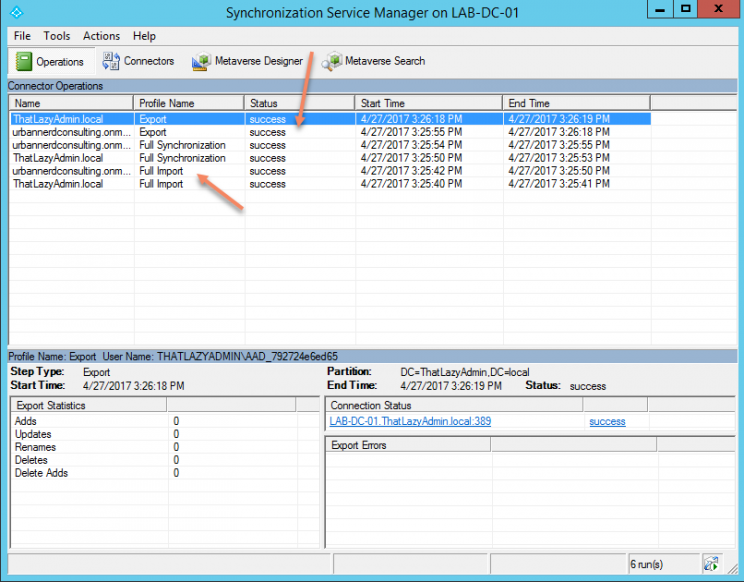
Let’s take a look at the Synchronization manager.
The tool can be located by clicking on start and select “Synchronization Service”
The tool gives you a quick view on which “synchronization ” failed and if the “sync” was successful.

Be First to Comment