How to Set Up and Manage On-Premises Environments with Azure Arc Site Manager (Preview) – A Comprehensive Guide
Introduction to Azure Arc Site Manager
In today’s complex IT environments, managing and monitoring on-premises infrastructure as seamlessly as cloud resources is a challenge many organizations face. Microsoft Azure has introduced an innovative solution to address this challenge: Azure Arc Site Manager. Currently in preview, Azure Arc Site Manager allows businesses to manage on-premises environments as Azure Arc sites, bringing the familiar Azure management experience closer to home.
What is Azure Arc Site Manager?
Azure Arc Site Manager extends Azure’s management capabilities to your on-premises infrastructure, allowing these environments to be managed as if they were native Azure resources. With Azure Arc Site Manager, you can set up sites scoped to an Azure resource group or subscription, which can then track connectivity, alerts, and updates across your environments. This is particularly useful for infrastructure located within common physical boundaries like stores, factories, or regional offices.
Key Features:
- Hierarchical Management: Create a hierarchy of sites within a subscription for structured resource management.
- Resource Monitoring: View inventory, connectivity status, updates, and alerts for supported resources.
- Flexible Grouping: Group resources by location, function, or type according to your operational needs.
How to Set Up Azure Arc Site Manager: A Step-by-Step Guide
Prerequisites
- An active Azure subscription (you can create a free trial account if you don’t have one).
- Azure portal access.
- Internet connectivity.
- At least one supported resource in your Azure subscription or resource group.
Step 1: Create Your Site
- Navigate to Azure Arc: In the Azure portal, search for and select Azure Arc. http://aka.ms/sitemanager
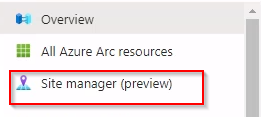
- Access Site Manager: From the Azure Arc dashboard, select Site manager (preview).
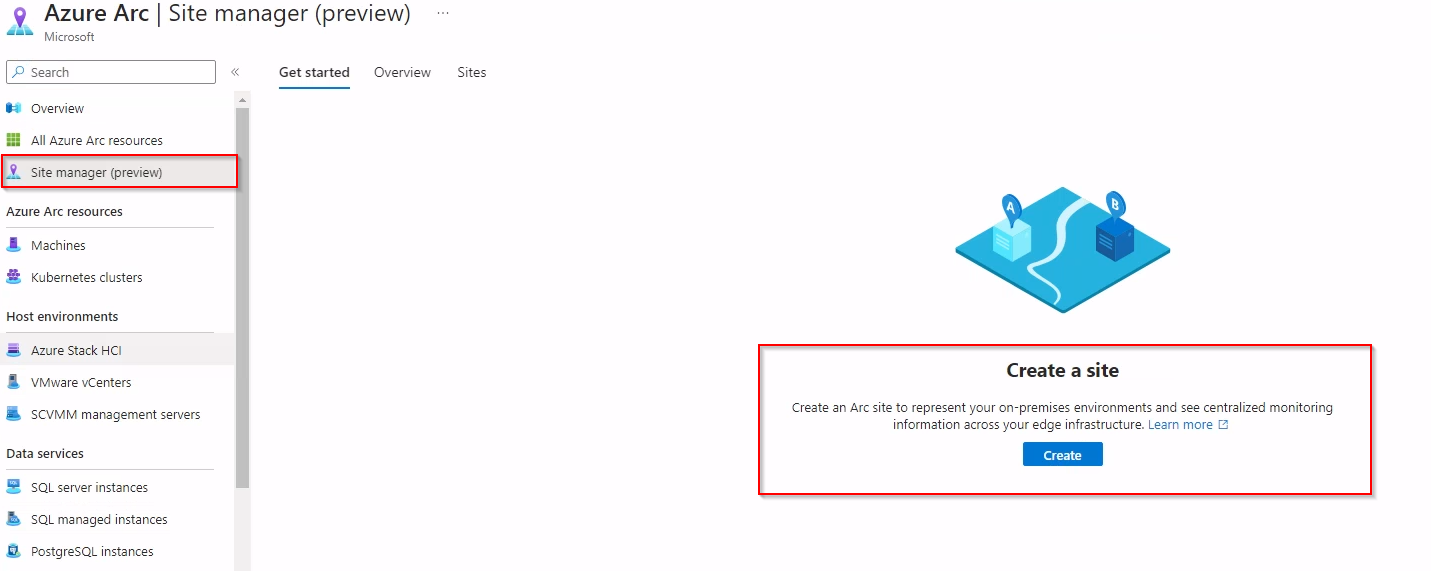
- Create a Site: Click the blue Create a site button.
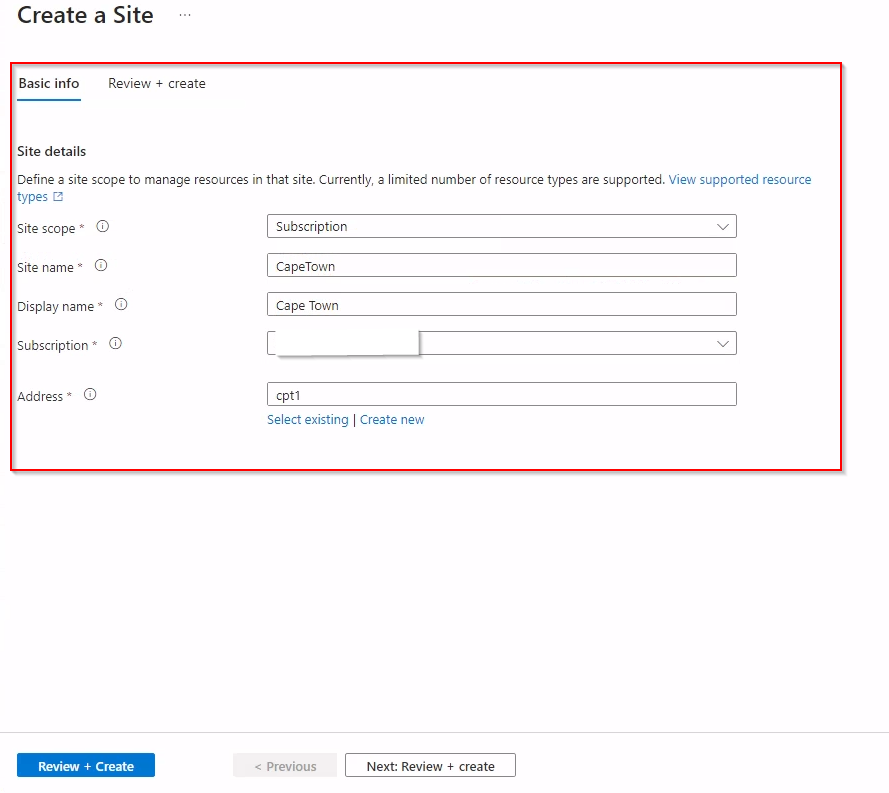
- Configure Your Site:
- Site name: Enter a custom name for your site.
- Display name: Provide a display name for easier identification.
- Site scope: Choose between Subscription or Resource group.
- Subscription and Resource Group: Select the appropriate subscription and resource group for your site.
- Address: Enter the physical address (optional).
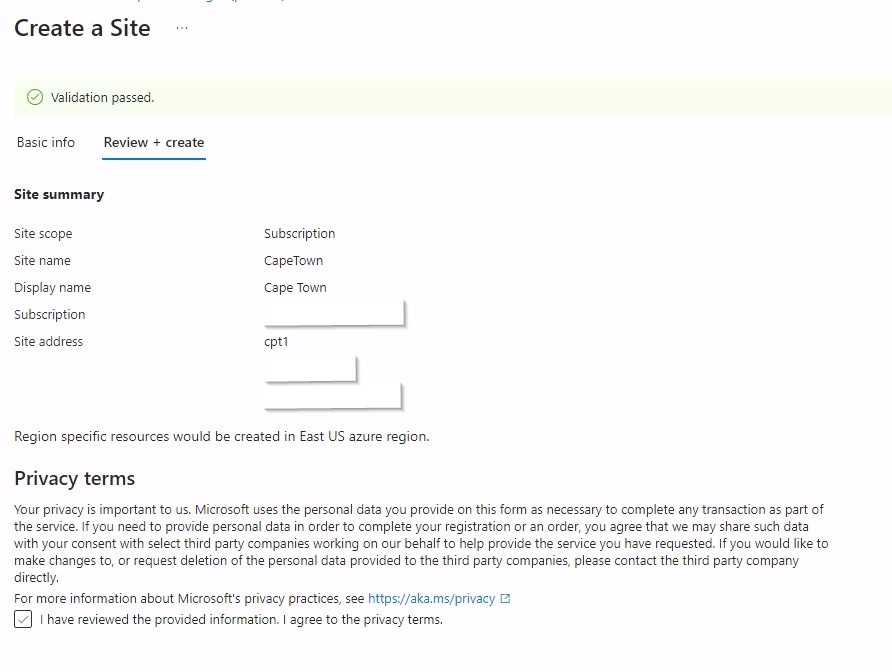
- Review and Create: After filling in the details, select Review + create, then Create to establish your site.
Step 2: View Your New Site
- Access Sites Overview: Back in the Site Manager dashboard, select Sites to view all configured sites.

- Manage Your Site: Click on your newly created site to manage resources, view statuses, and configure alerts.
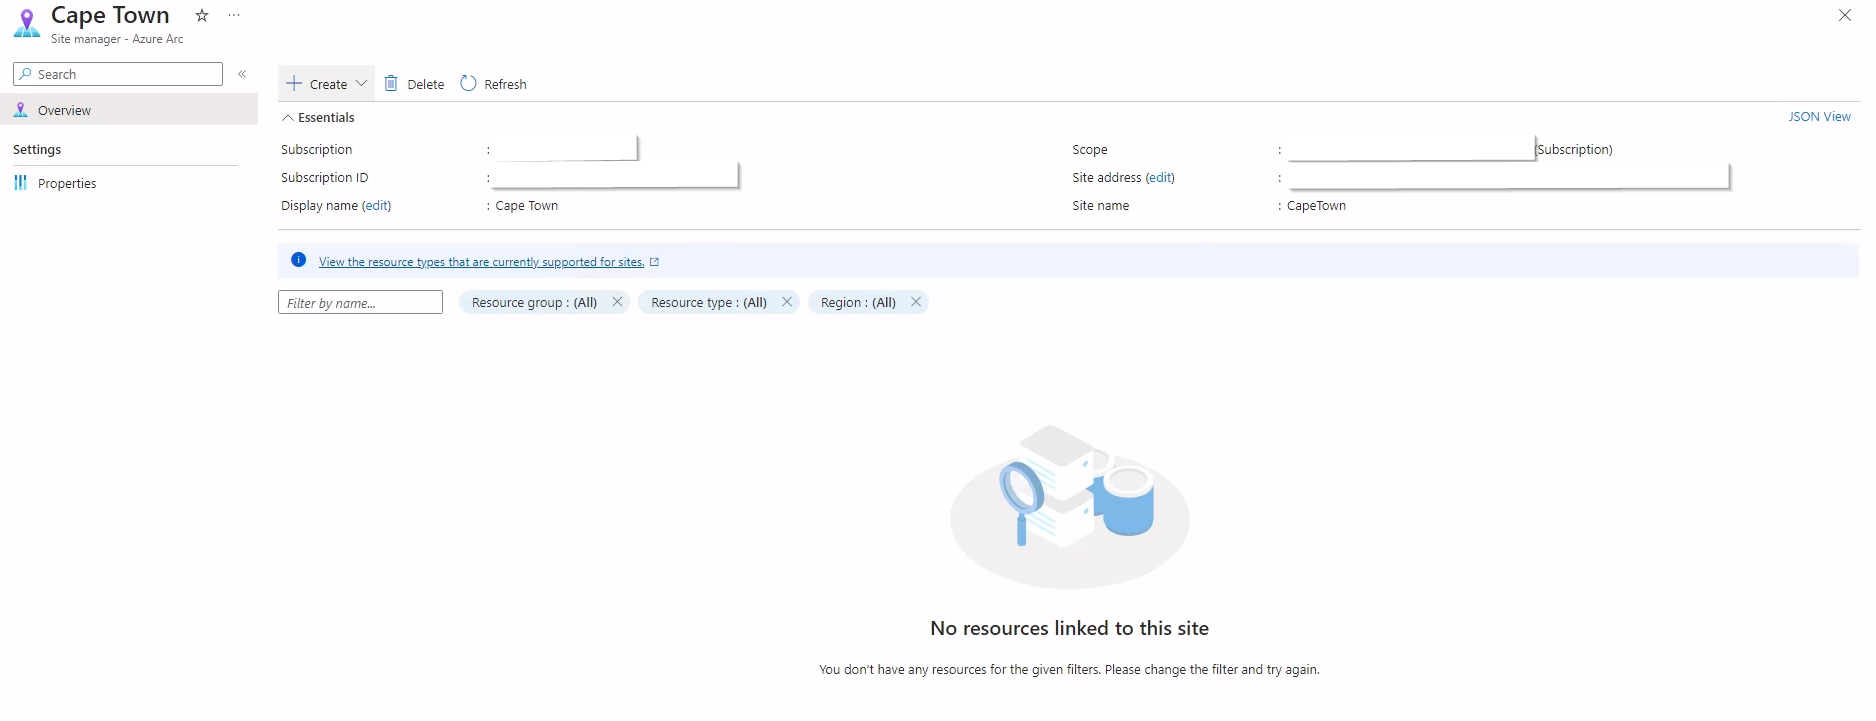
Step 3: Delete Your Site (If needed)
- From the specific site’s resource page, select the option to delete your site. This action does not impact the actual resources but removes the site configuration in Site Manager.
Conclusion
Azure Arc Site Manager is shaping up to be a robust tool for managing and monitoring on-premises resources with the efficiency and scalability of Azure’s cloud services. By integrating on-premises resources into Azure Arc, organizations can enjoy streamlined management across their hybrid environments, making it easier to maintain, update, and secure their infrastructure.
Important Note
As Azure Arc Site Manager is in preview, it is subject to change and may have limited support. Always check the latest documentation and terms of use when planning to integrate new services into your production environments.
This guide provides a foundational understanding and the initial steps to get started with Azure Arc Site Manager. As you integrate these tools into your infrastructure, you’ll unlock new potentials for managing resources efficiently and effectively.
For more detailed information on specific configurations and advanced features, refer to the official Microsoft Azure documentation.
- https://learn.microsoft.com/en-us/azure/azure-arc/site-manager/

Be First to Comment