Integrating AWS with Microsoft Defender for Cloud: Enhancing Your Cloud Security Posture
In the realm of cloud computing, safeguarding assets against the ever-evolving threat landscape is paramount. Microsoft Defender for Cloud, formerly known as Azure Security Center, stands as a unified infrastructure security management system that strengthens the security posture of your cloud environments. This comprehensive blog post delves into the essence of Defender for Cloud and elucidates the process of integrating it with Amazon Web Services (AWS) to fortify your cloud estate.
What is Microsoft Defender for Cloud?
Microsoft Defender for Cloud is a cutting-edge tool designed to provide security management and threat protection across hybrid cloud environments, including Azure, AWS, and Google Cloud Platform. It offers a plethora of capabilities, such as:
- Continuous Assessment & Recommendations: It continuously assesses your cloud environments to identify potential vulnerabilities and provides actionable recommendations to mitigate them, thereby enhancing your security posture.
- Automated Security Controls: It applies security controls across your workloads and services, aligning with industry best practices and regulatory standards.
- Advanced Threat Protection: It employs advanced analytics and global threat intelligence from Microsoft to detect and respond to threats in real time.
- Integrated Security Solutions: It integrates seamlessly with a wide range of security solutions, providing a centralized view of your security posture across all connected cloud environments.
Benefits of Defender for Cloud for AWS Estates
Integrating Defender for Cloud with AWS brings numerous advantages, such as:
- Enhanced Visibility: Obtain a unified view of your AWS and Azure security posture, enabling efficient monitoring and management of cloud resources.
- Comprehensive Coverage: Benefit from a wide range of security tools and features that cover various aspects of your cloud environment, from identity and access management to data protection.
- Proactive Threat Detection: Leverage advanced threat detection capabilities to identify and mitigate potential threats before they cause harm.
- Compliance Assurance: Ensure compliance with industry standards and regulatory requirements through continuous assessment and tailored recommendations.
Connecting AWS to Defender for Cloud: A Step-by-Step Guide
Step 1: Set Up AWS Account for Integration
- Log into the Azure portal to begin.
- Access Defender for Cloud by locating it within the portal, then proceed to ‘Environment settings’.
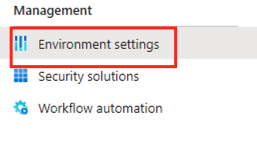
- Click on ‘Add environment’ and select ‘Amazon Web Services’ as the environment you wish to add.

- Initiate the process of linking your AWS account with your Azure subscription by selecting it.
- Input your AWS account details, paying special attention to the location designated for the connector resource. Opt for the ‘Single account’ choice to proceed.
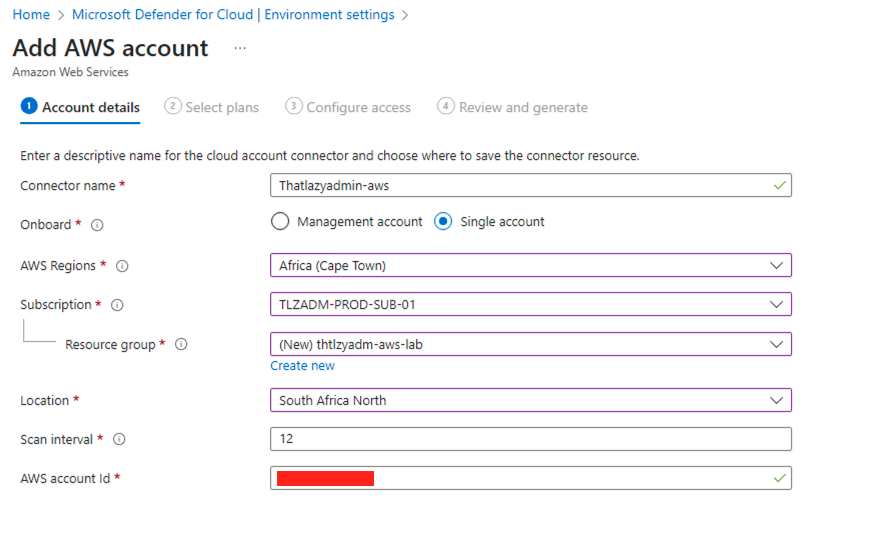
- Select Next: Select plans.
The Foundational CSPM plan is enabled by default.
- Ensure that the Defender CSPM, Servers, Containers and Database plans are set to On or selecting the relevant services active in your aws environment. As part of this lab I will only enable Servers.
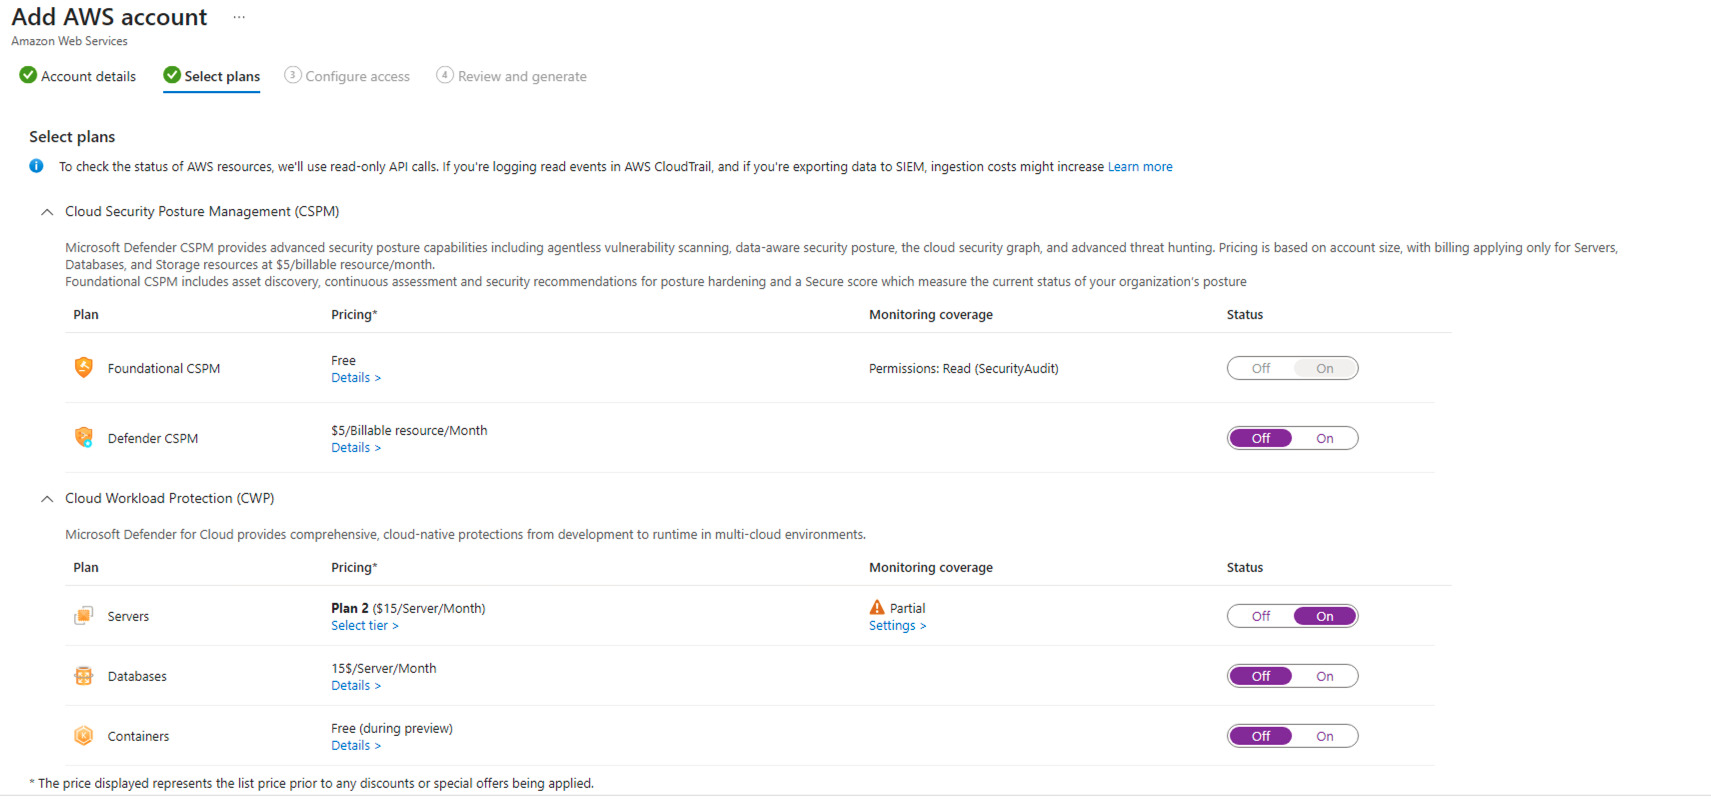
- As you can see Servers is showing partially configured, click on Settings to review. As you can see part of the deployment is Azure ARC and agentless scanning on ECS instances.
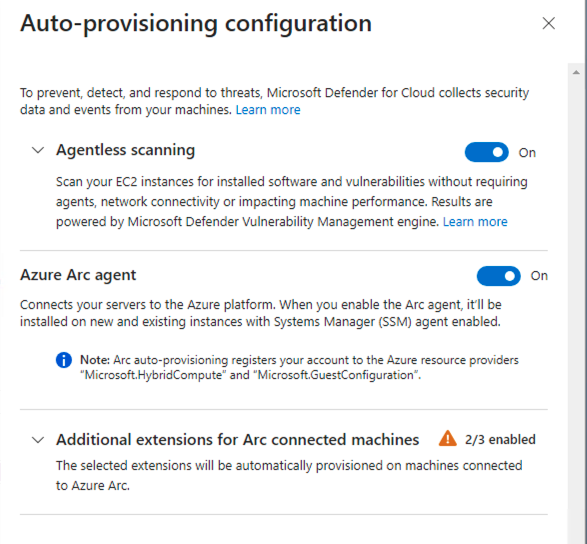
- Expand Additional extensions for Arc connected machine, to view the available options. As you can see the auto-provisioning configuration no longer deploys the Log Analytics agent, the agent is now on a deprecation path.
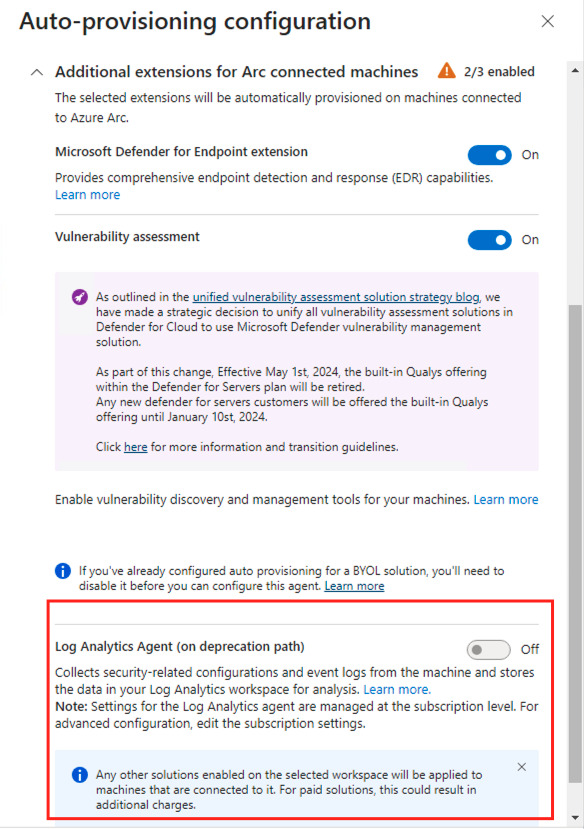
- Click on Next – Configure access, on the following screen you will be presented with a AWS CloudFormation script which you need to download and upload in aws.
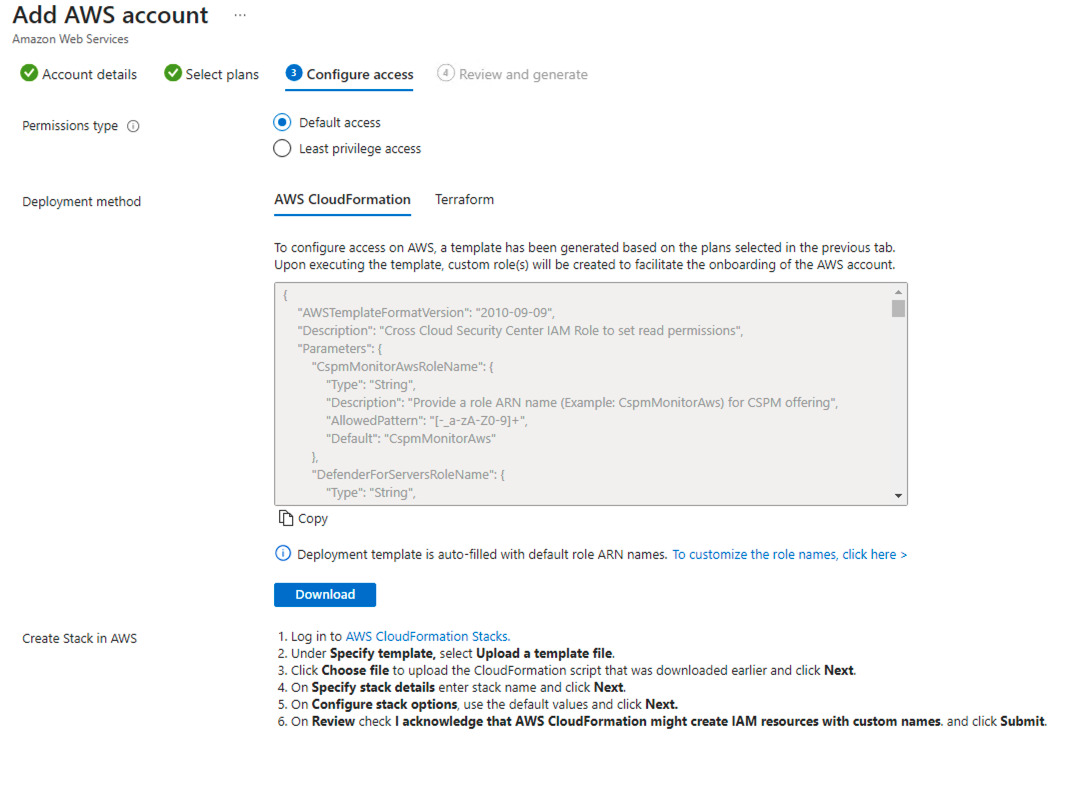
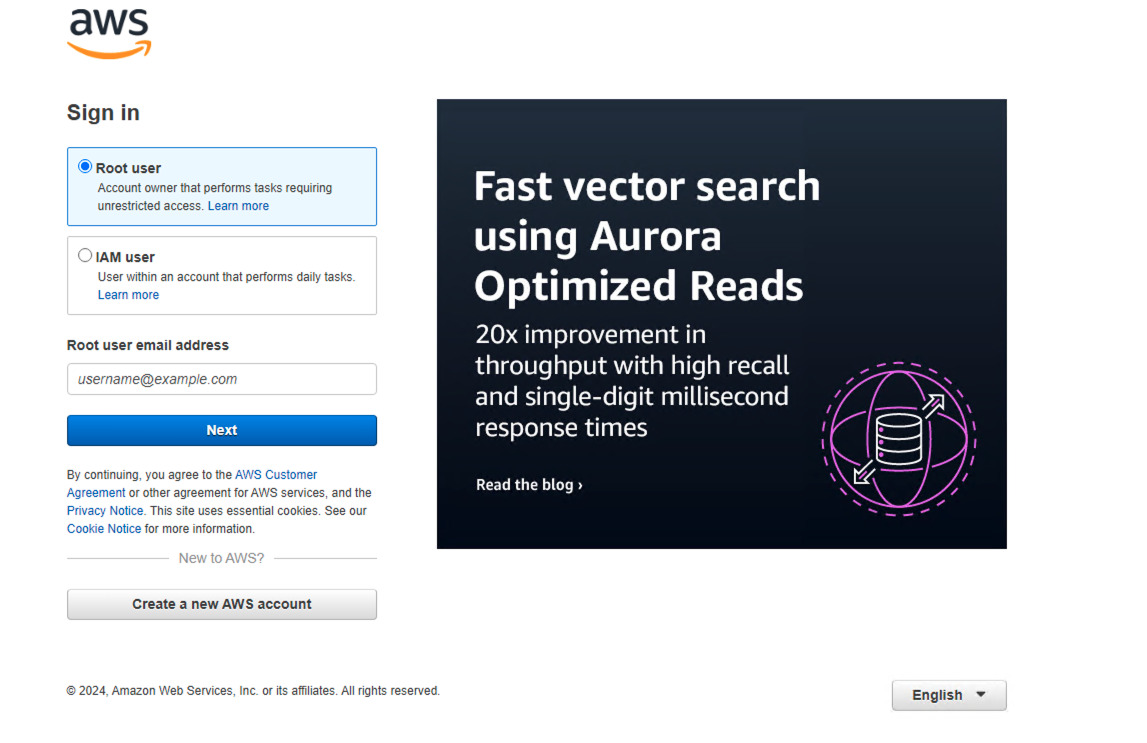
Let’s, Hop over to AWS CloudFormation stack and upload the template.
- Login in to AWS CloudFormation Stacks and sign in with your admin account or an account that has the delegated permissions: https://eu-central-1.console.aws.amazon.com/cloudformation/home#/stacks/create
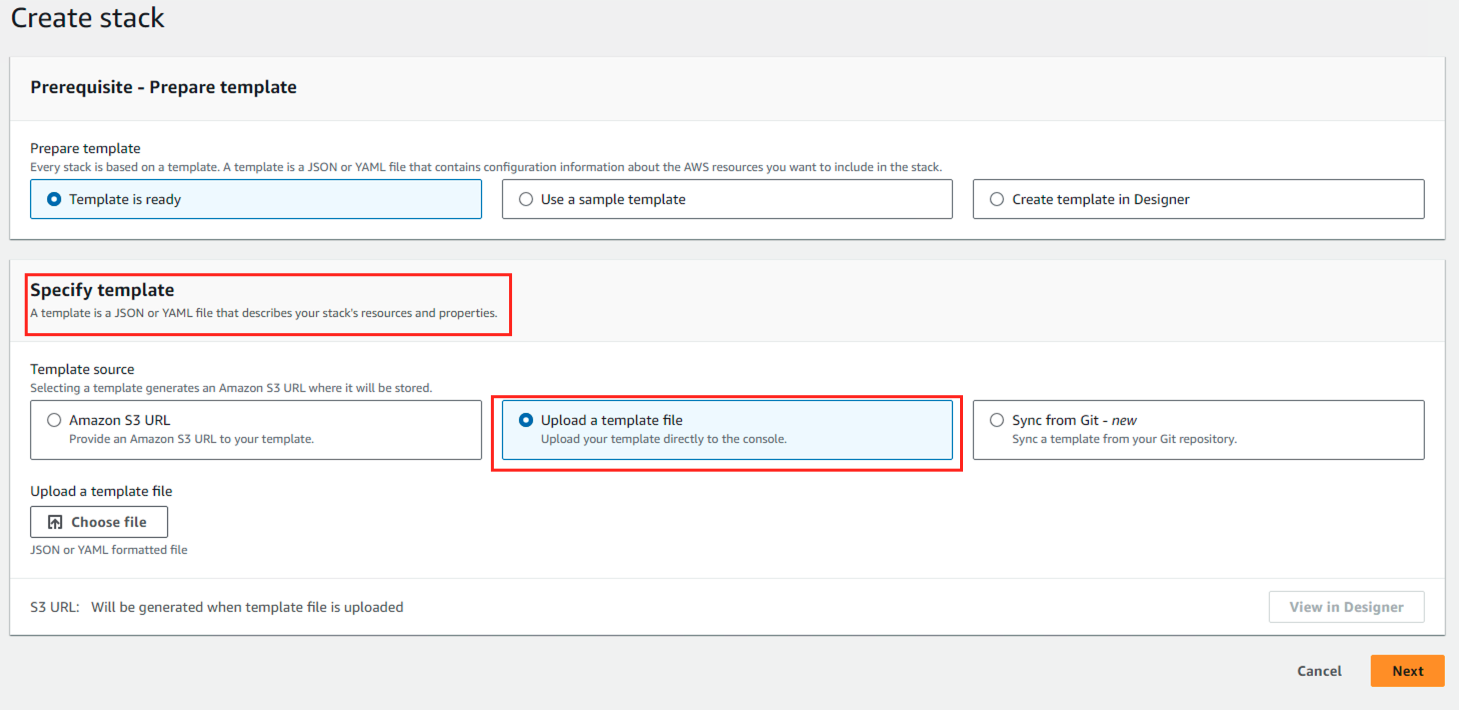
- On the Create Stack page, select Upload a template file, then click Next.
- On the Specify stack details, enter stack name and click Next.
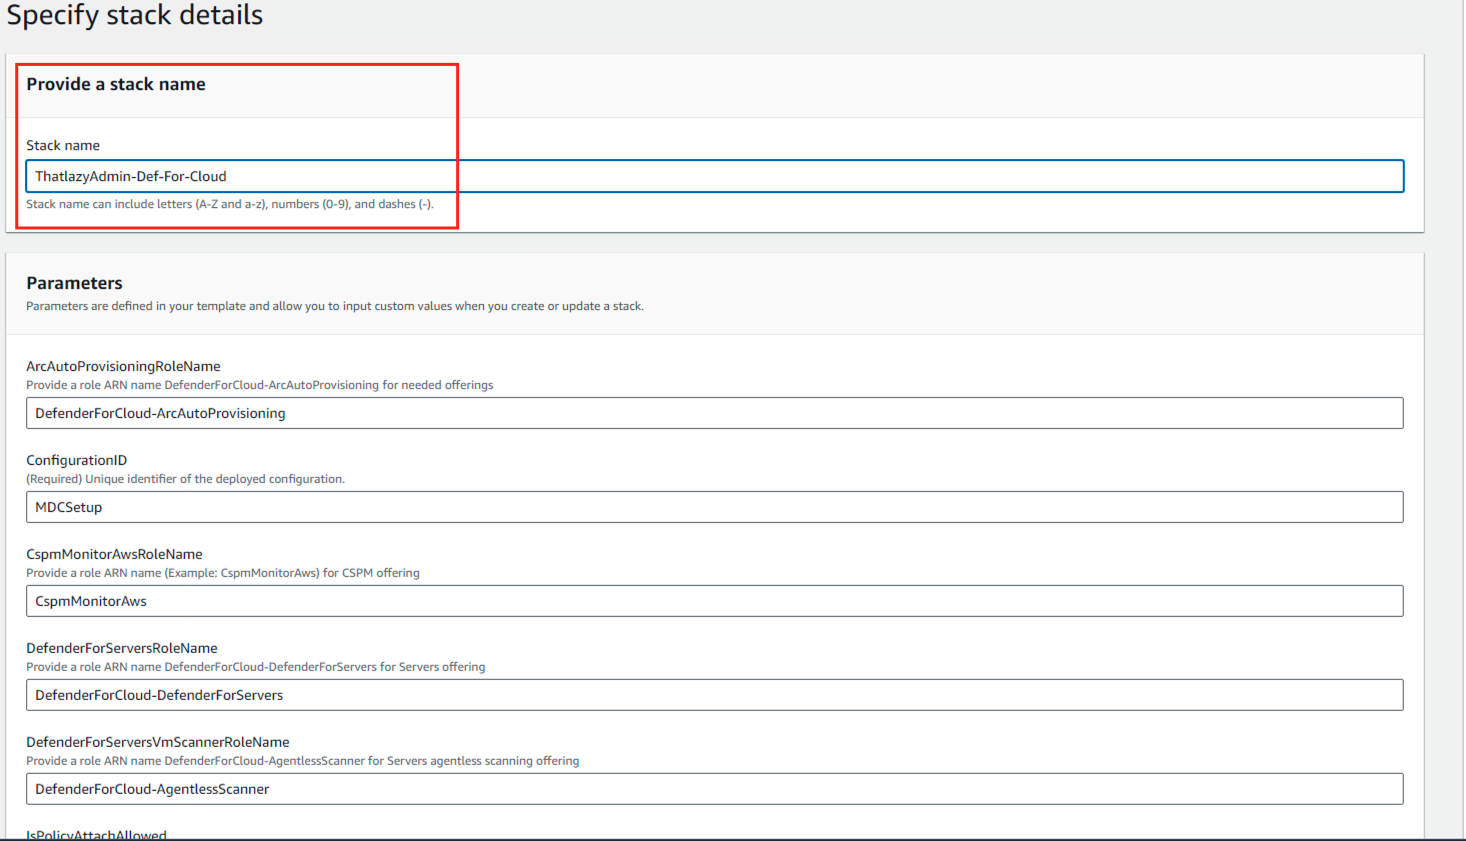
- On the Configure stack options, use the default values and click Next.
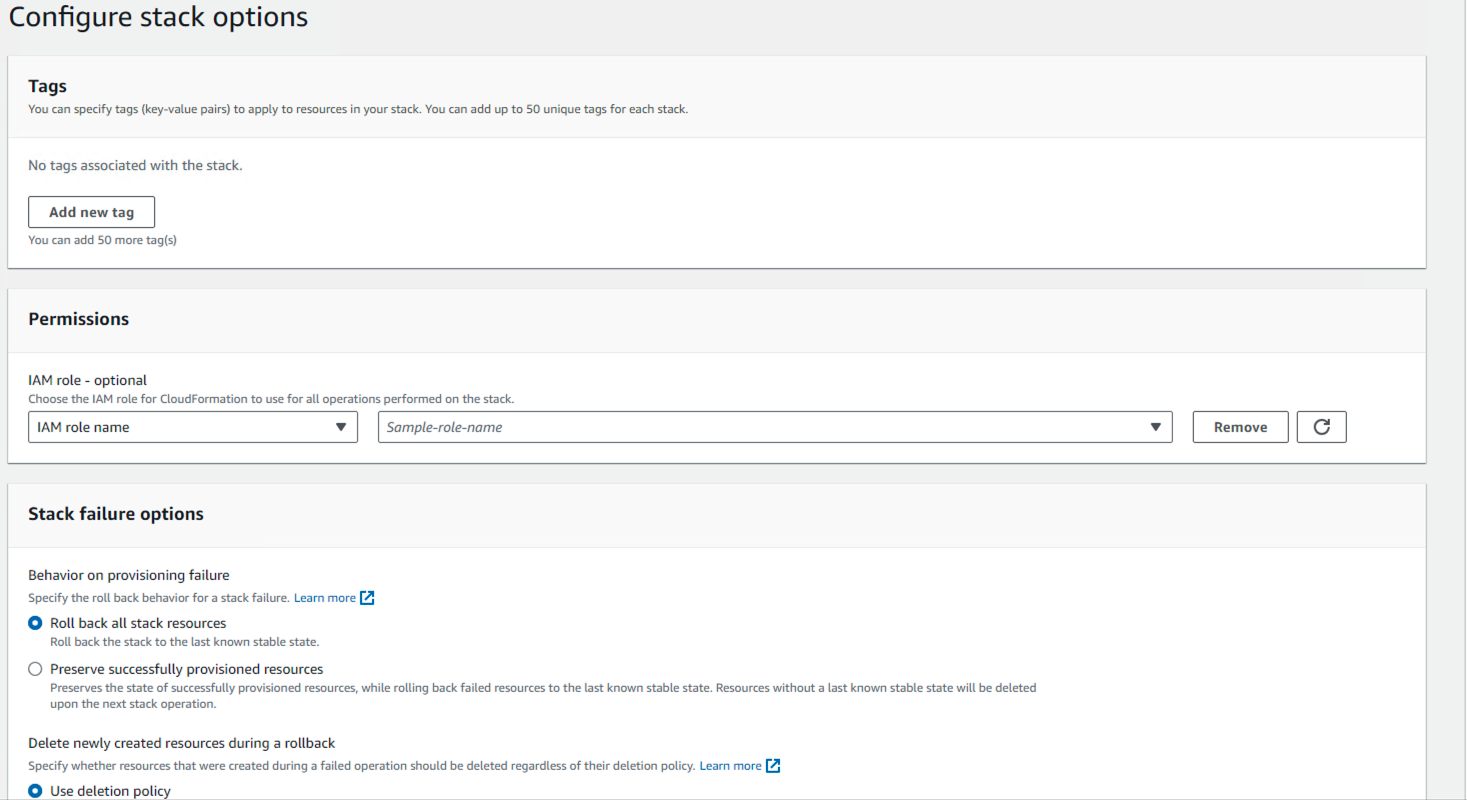
- Lastly, on the review check I acknowledge that AWS CloudFormation might create IAM resources with custom names. And click Submit.

- On the progress page, you can view the events as the CloudFormation creates additional resources in AWS.
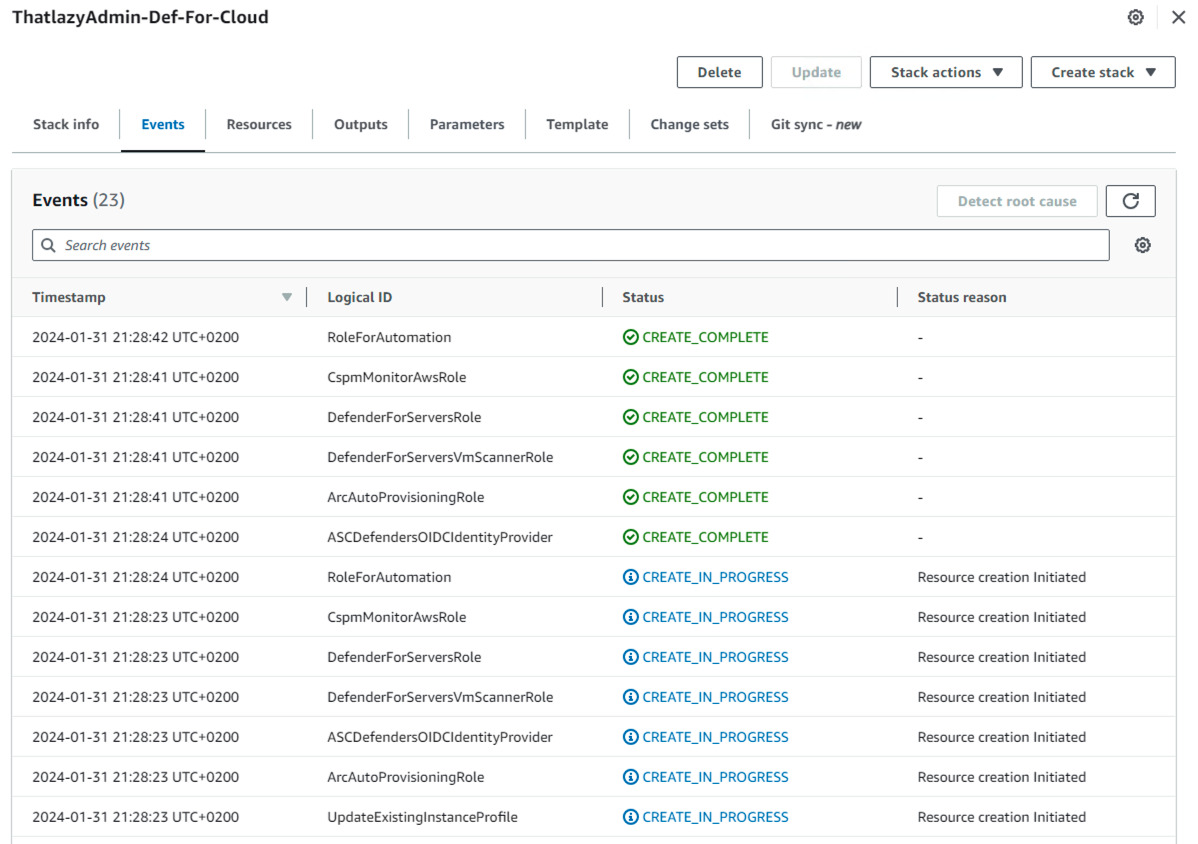
- Back on the Defender for Cloud Portal, let’s go ahead and complete the setup and click Next: Review and generate. Click on “Create”
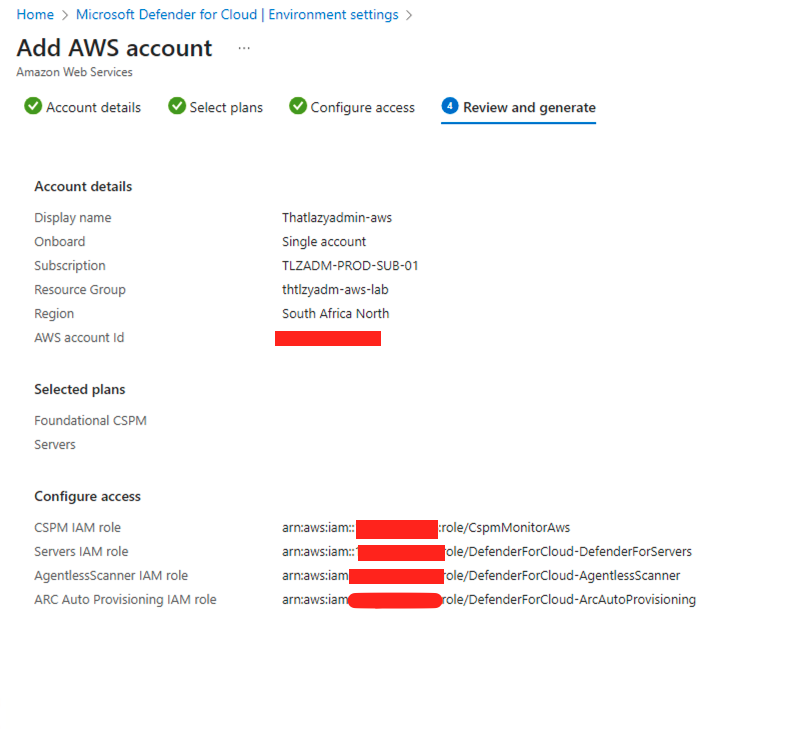
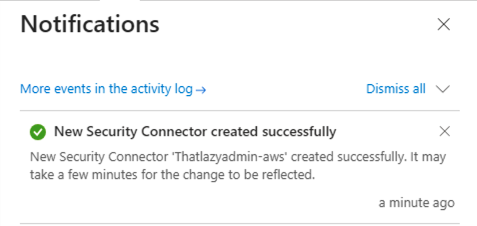
- Select the Notification bell on top to see if the connector was created successfully. If successful you will see the following message.
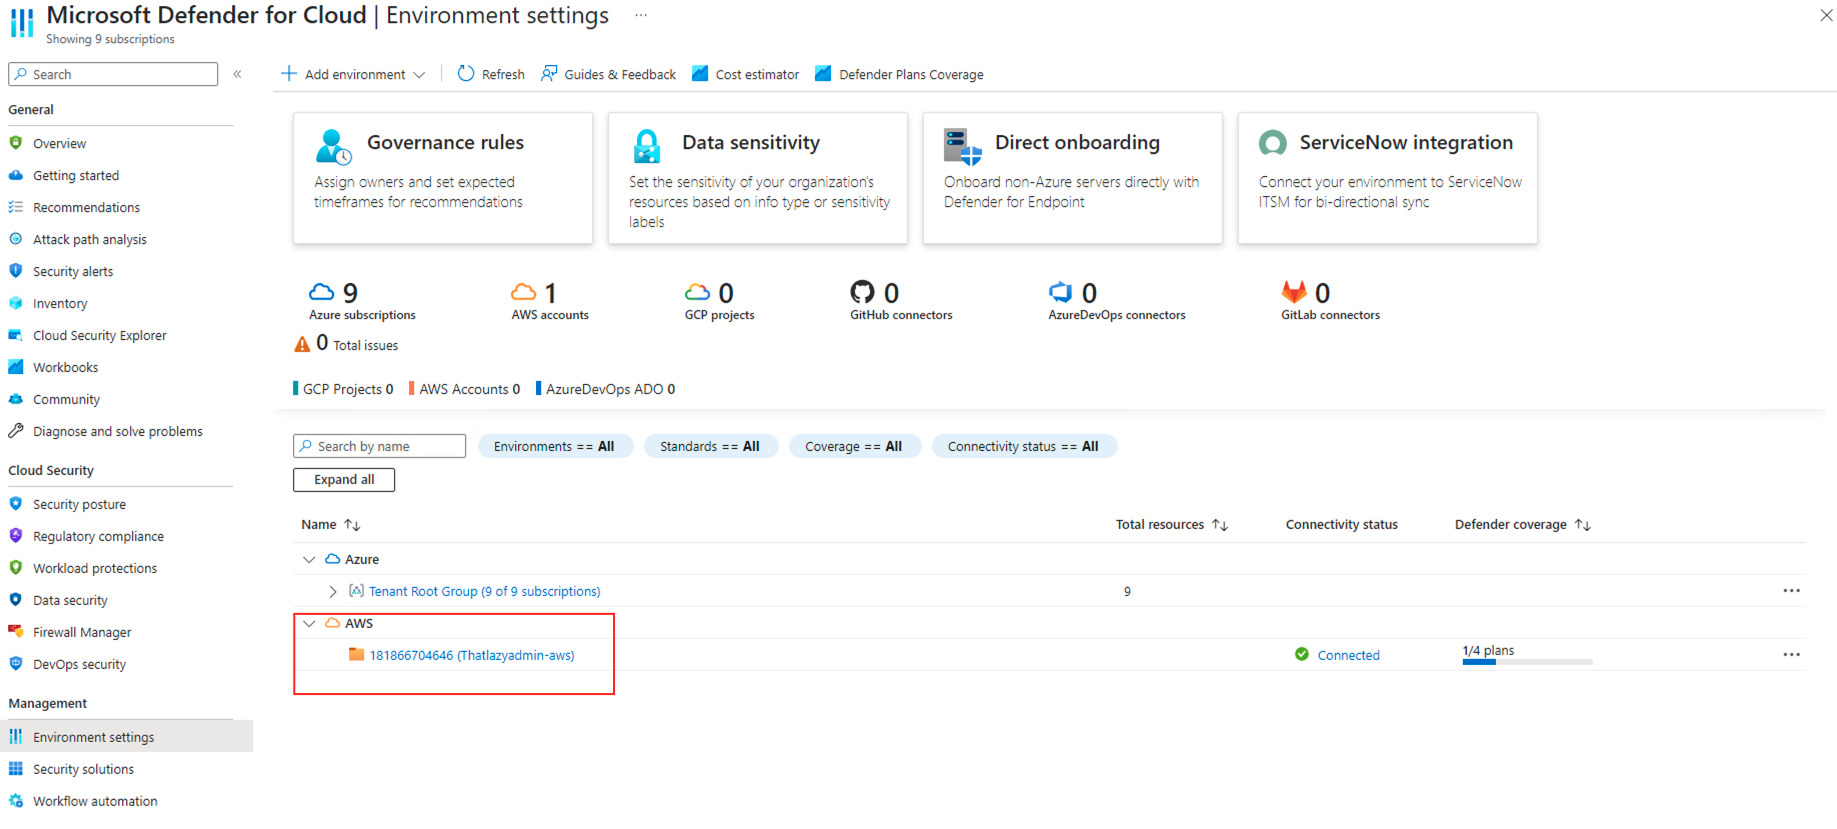
On the Environment Settings page, you will now be able to see your Azure and AWS resources and which Defender for Cloud Plans are enabled. The newly added AWS environment will now be listed.
In a follow up post, I will look at the recommendations and alerts generated from the aws environment.
Conclusion
Integrating AWS with Microsoft Defender for Cloud equips organizations with a robust framework to secure their cloud environments against a spectrum of threats. By following the steps outlined above, businesses can leverage the synergy between AWS and Defender for Cloud to enhance their cloud security posture, ensure compliance, and protect their critical assets in the cloud.
Embracing this integrated approach allows for a more resilient and secure cloud infrastructure, enabling organizations to focus on innovation and growth while maintaining the integrity and confidentiality of their data.

Be First to Comment