How to create a migration endpoint Exchange Online
In post we, will go through the steps to create a new migration endpoint for Exchange Online.
To get started, connect to Office 365 Admin Portal then navigate to Exchange Online Admin Portal.

From the Exchange admin centre, click on “Recipients”.

From the “Recipients” menu select “migration”

From the “migration” menu click more option “…” and select “migration endpoints”

From the “migration endpoints” menu click on “+”

Select “new migration endpoint”
![]()
 From the new migration endpoint menu, select “Exchange Remote” and then click next.
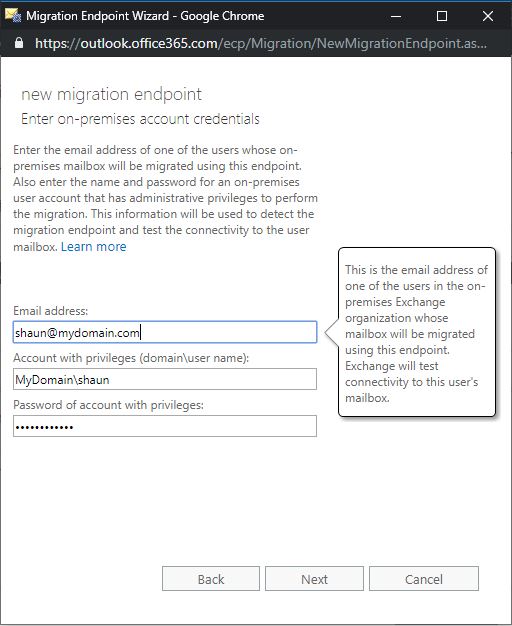
Enter the credentials of an account that has elevated rights on the on-prem environment.

Wait for the validation to complete and then you ready to start creating your next migration batch jobs.
This can be started by click on “+”

Select “Migrate to Exchange Online”


Be First to Comment