
Last updated on Apr 4, 2019
Creating a New Microsoft Teams Meeting Policy
To create a new Microsoft Teams Meeting Policy can be done using the Teams Admin console and Windows PowerShell.
The new Teams Policy should cater for the following.
- Applies to users in Low Bandwidth regions
- Limit the features in Teams which requires more bandwidth
To get started navigate to https://portal.office.com > Admin > Admin centers > Teams.
From the Teams admin Centre navigate to Meetings > Meeting Policies > Then click New Policy.

From the new policy menu, provide a name and description for the new policy. Leave the general settings as default.

Next from the Audio & Video settings remove the following options.
Turn off the following:
- Allow cloud recording
- Allow IP video

Under the Content sharing configure the following.
Disable the following:
- Screen sharing mode
- Allow whiteboard
- Allow shared notes

Once done, click on Save at the bottom of the screen.
From the Meeting Policy menu, you will now see the newly created Teams Meeting Policy.

Last but not least, the new policy needs to be applied to a set of users. To apply to users, do the following.
From the Teams admin center, navigate to Users

To filter for a certain set of users, click on the Filter icon in the top right-hand corner.
![]()
Select a user and, then click on Assigned policies at the bottom then click on edit.

On the Edit user policies menu, click on the Meeting policy drop-down and select the new policy.

Click on Save at the bottom to apply the changes.

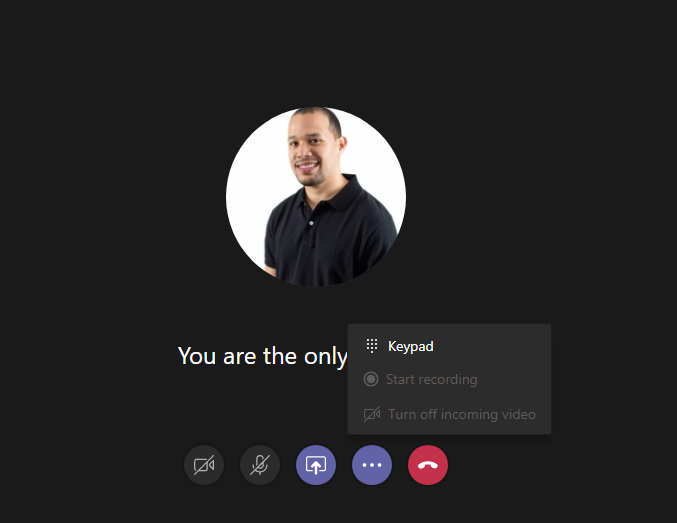
What does it look like form a user perspective after the changes has been applied?
In the call, you will notice that the user does not have the permission to do video call.
Be First to Comment